Devices
A device in general is defined as a data stream which generates measurement data on a location. It can be an IoT device or a webhook from a gateway or a connection to an existing database.
IoT Device
In case the measurement data comes directly from an IoT device then this IoT device can be connected to a location. A location is the representation of the asset that is measured, or the location where the measurement is performed.
Device installation process
The device installation process consists of a few steps. Ideally connectivity at the location is tested first. Then, the device is installed. Lastly, while on the location the device is connected to the location and ports in the monitoring environment.
Test cellular connection at the location
Ideally, the device connectivity is tested before installation, to make sure the device is able to make cellular connection at that location. This can also be done after installation, but if there is a problem, the work of connecting all the wiring may have been in vain.
To test the connection follow these steps:
- Attach the antenna if needed
- Turn on the device
- Go to the monitoring environment of the device
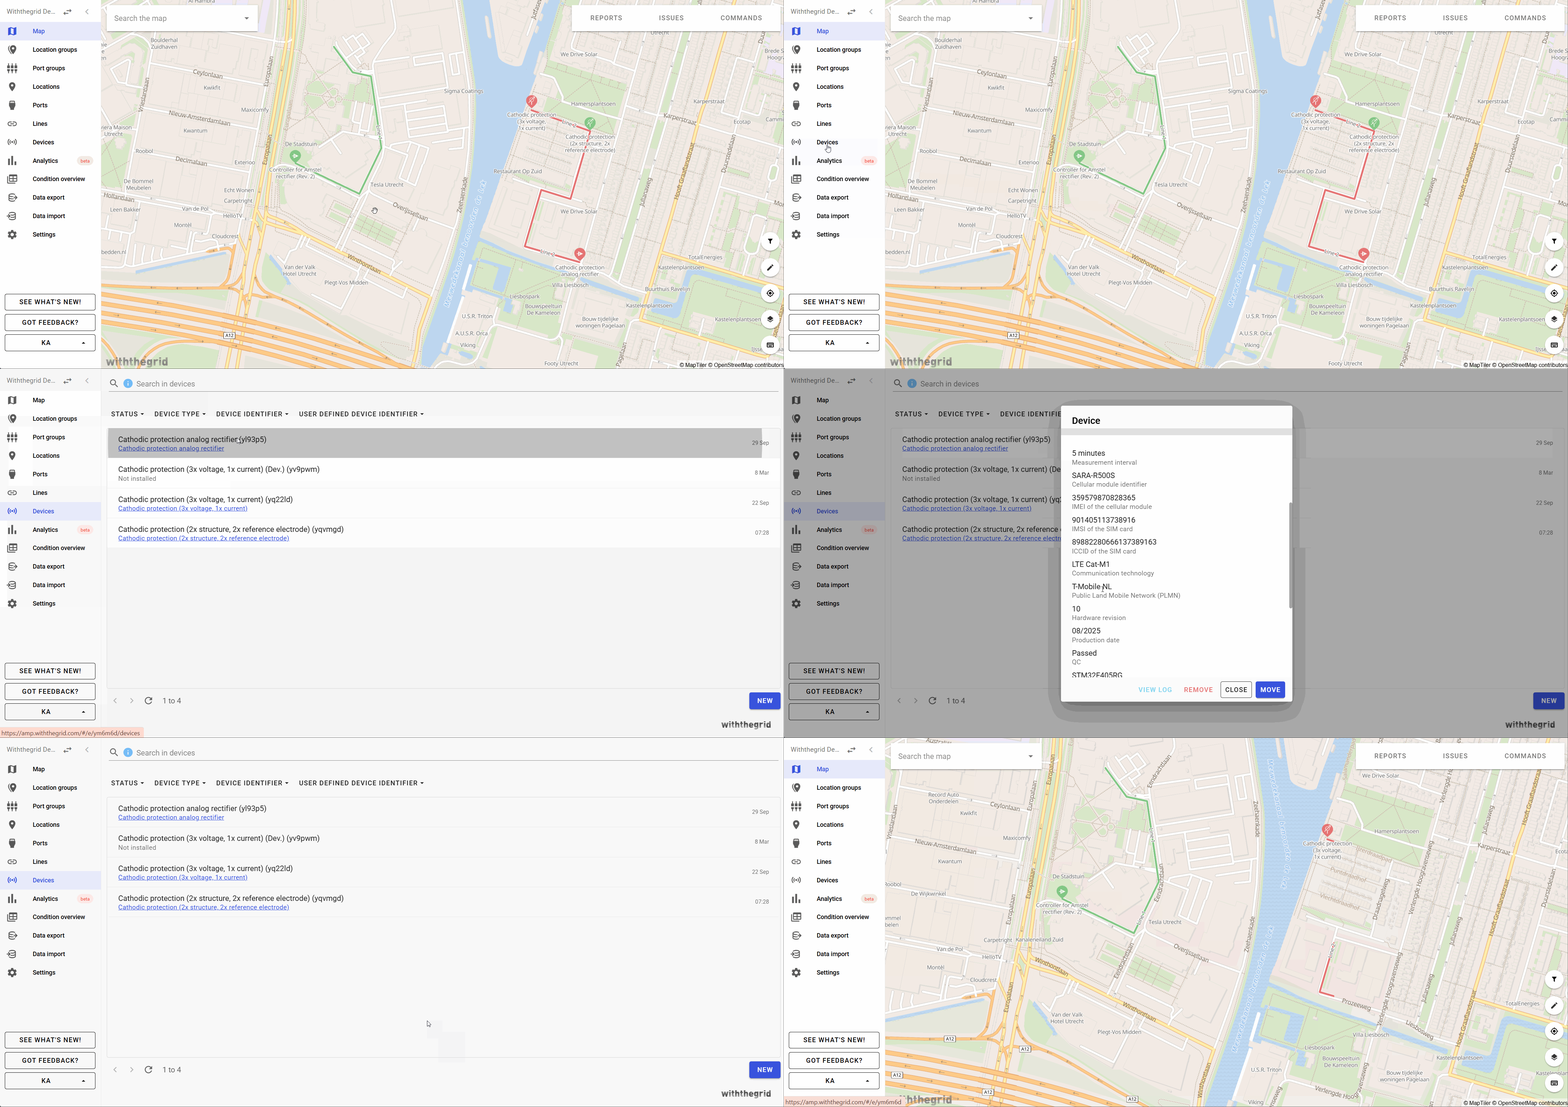
- Go to ‘Devices’ and find the specific device on the basis of the Device ID
- Check the most recent time the device was online (if only a time is shown, that means it was today)
Install the device
Depending on the type of device, installing the device in the field typically requires attaching it to the wall or placing it in a pole or cabinet. The sensors of the device have to be attached to the specific point on the asset where measurement need to be taken. Generally, it is important to install the antenna in a location where it is not obstructed from making cellular connection.
Connect the device to a location in the monitoring environment
This is done by filling in the unique Device ID (hashID) which is listed on the device.
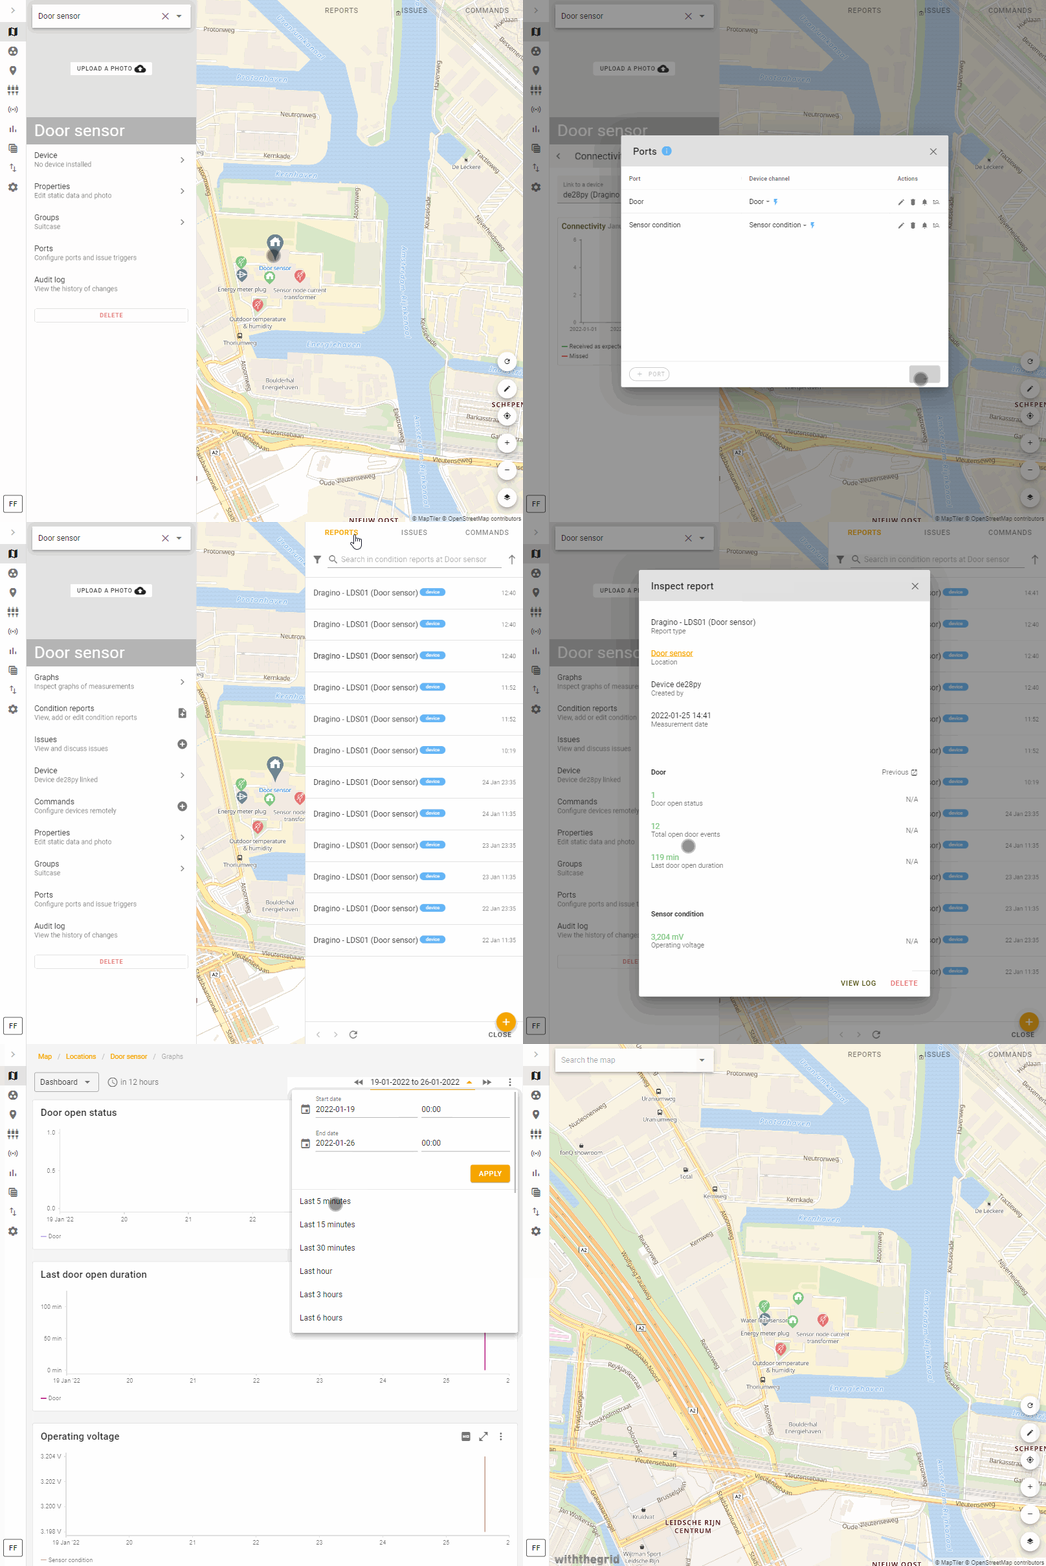
In case the measurement data comes from another data source through for example a webhook, then the connection process is carried out in the same way. To see how to generate hashIDs or how to set up such links see the connectivity environment section.
A device can be unlinked from a location and linked to another location or even a different monitoring environment. We demonstrate how to connect and remove a device to/from a location in a how-to video.
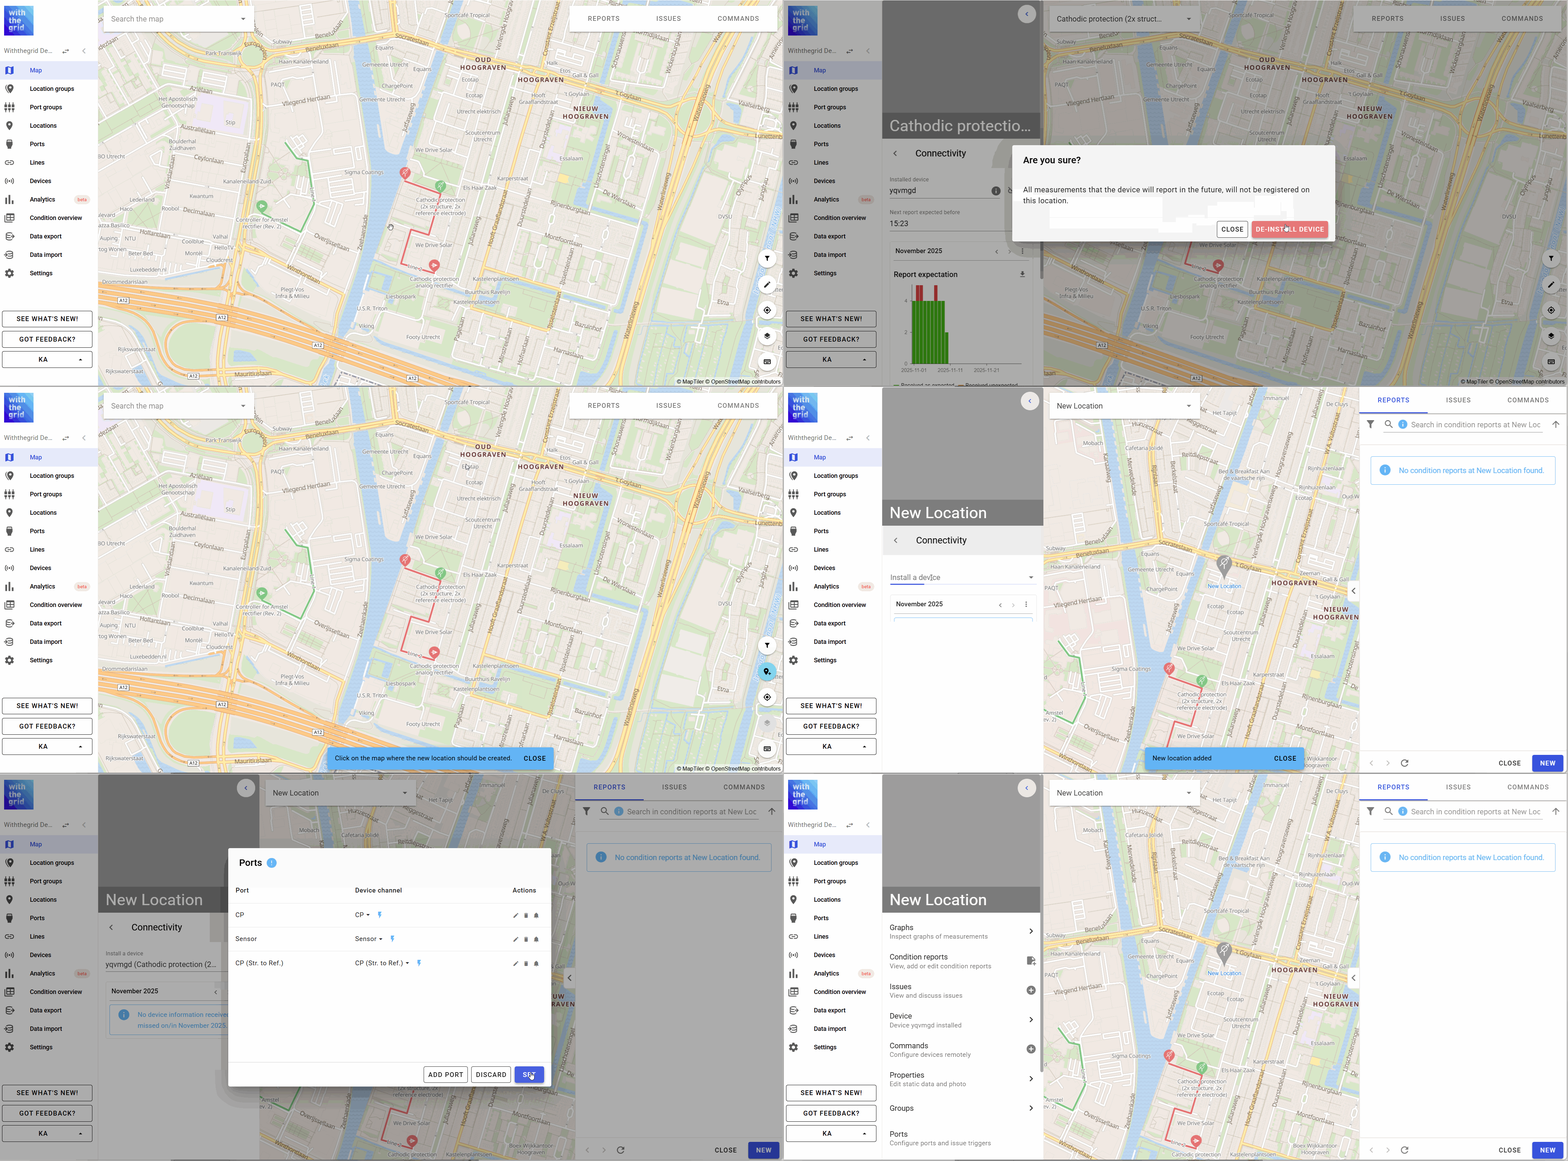
In the GIF below it is shown how to create a new location and link a device to that newly created location. The steps taken are:
- Unlink a device from a location (in this case ‘Test location 1’)
- Create a new location
- Link the device to the new location
- Create ports
- Go to graphs (where no old data is stored and new data will be coming in)
Commands
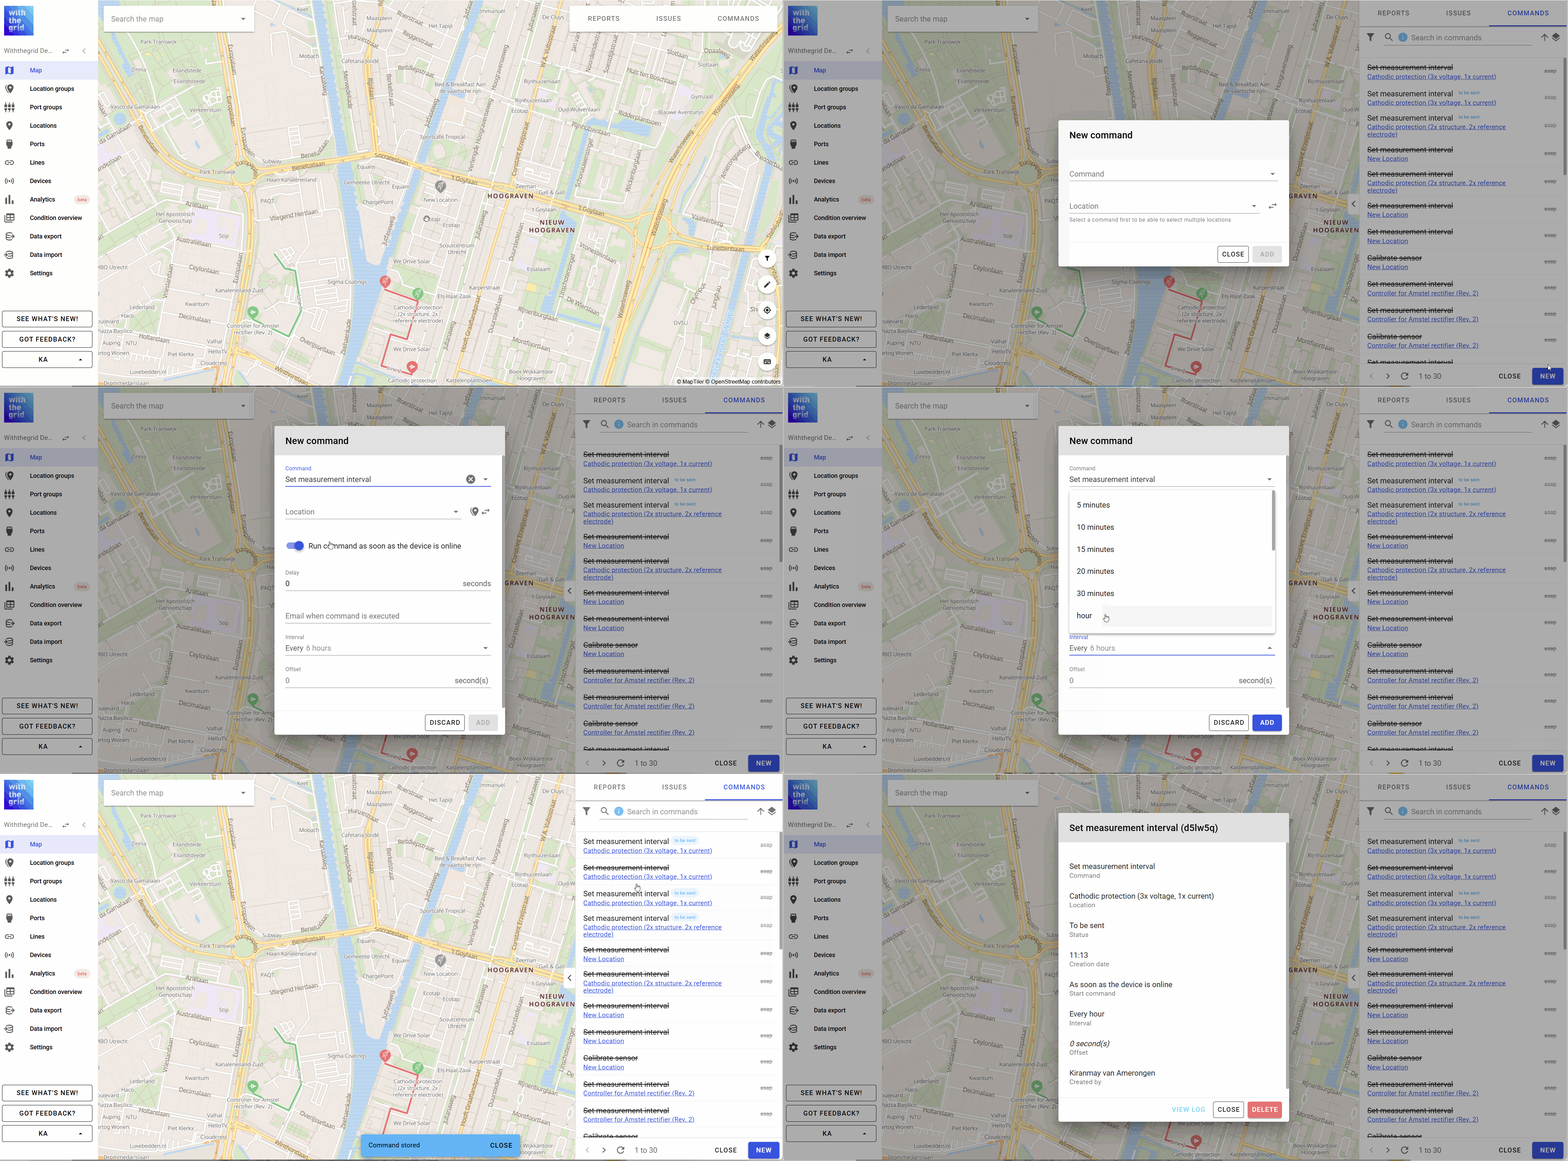
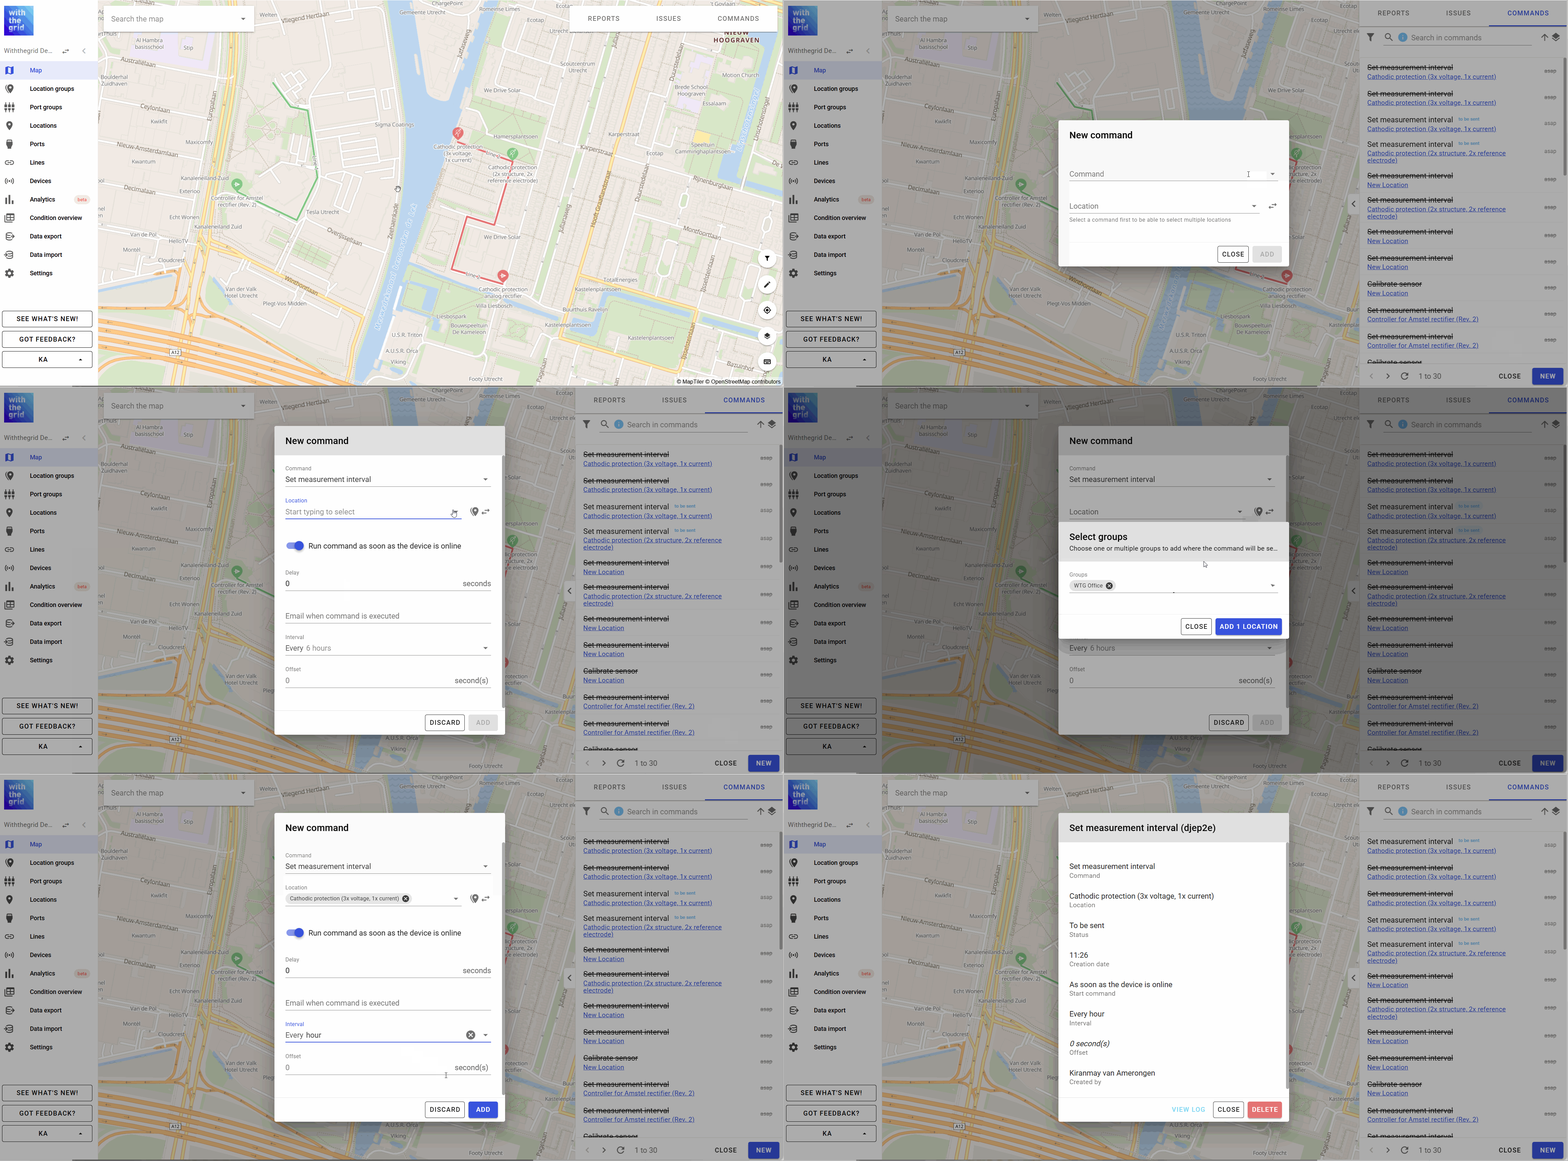
Many devices also use bi-directional communication to activate specific functionality, change measurement frequency or update the device firmware. You can view the specific device commands by going to commands. There you can schedule a new command or you can see the history of executed or planned commands. The device supplier can configure which commands are visible in the monitoring environment.
Commands in batches
A command can be sent to a number of devices which share the same command type. It is also possible to send commands to all devices that share a command type in an existing group of locations, or to all devices of the same device type.
Search syntax
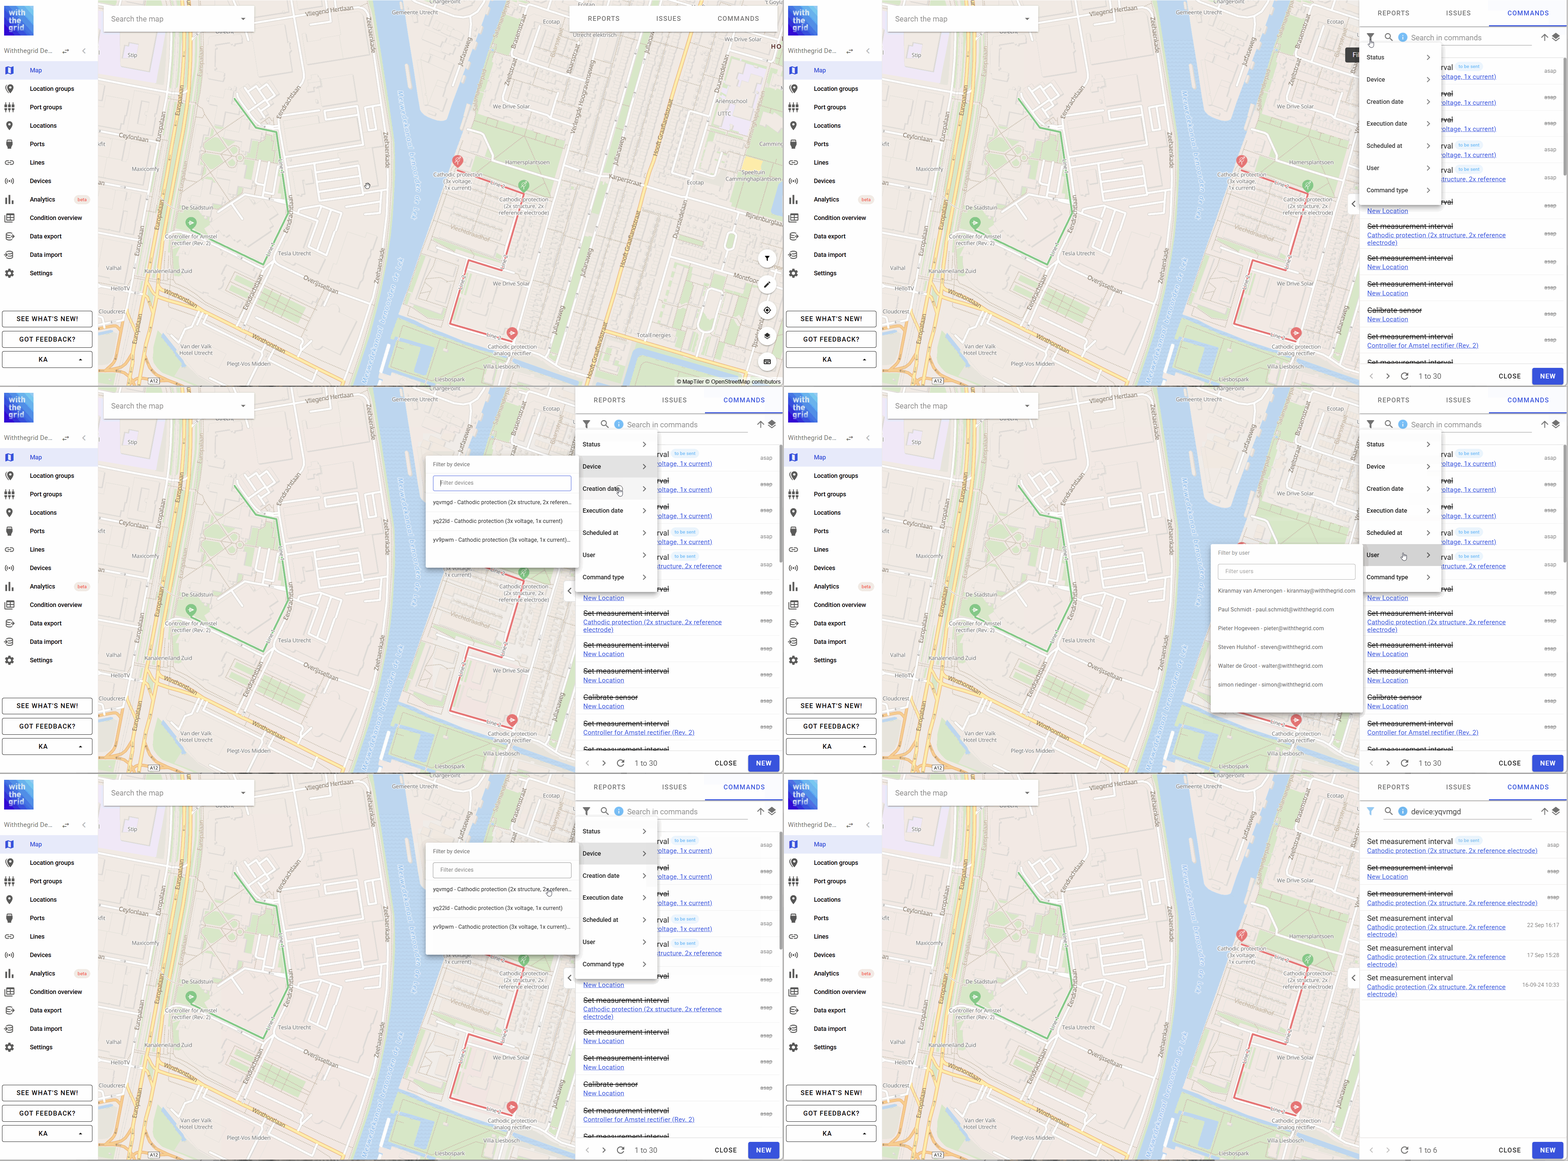
It is possible to search the commands with different constraints such as whether commands were executed, for specific devices, which user created the command and whether it was planned on or before a specific date.
How-to videos
Watch the video on Youtube